Hi everyone! Big apologies that this post has come two weeks late - I've been awfully busy recently and haven't found time to update my blog!
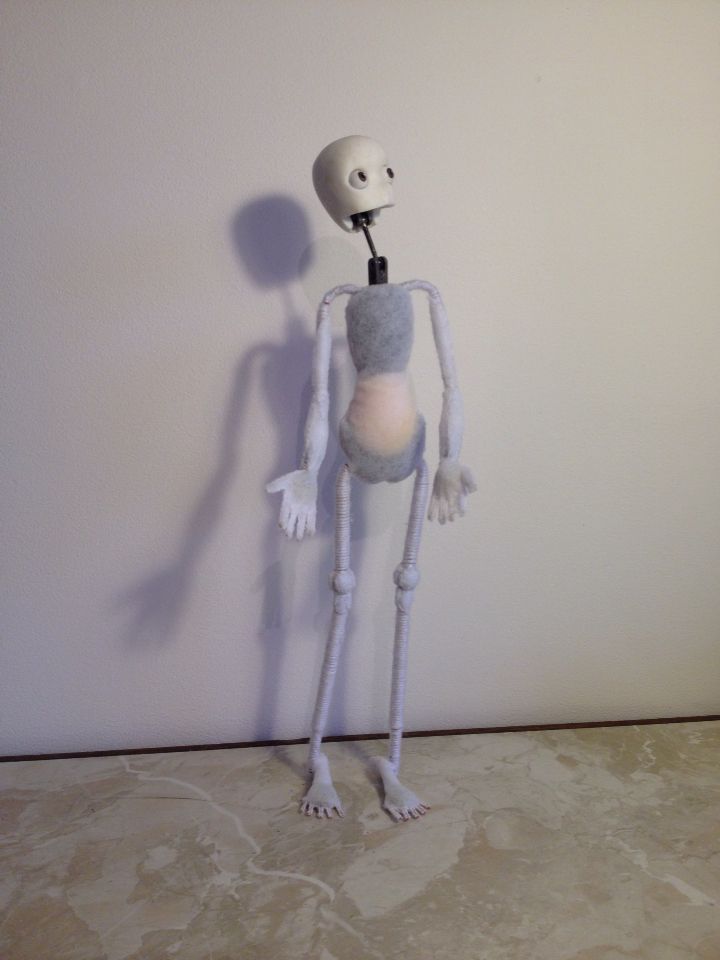
I'm going to continue from where my last post left off, which covered the process of building up Nausicaa's body in soft sculpture. I've made a lot of progress since - she has a face now and is ready to get her nylon skin!
I'm going to continue from where my last post left off, which covered the process of building up Nausicaa's body in soft sculpture. I've made a lot of progress since - she has a face now and is ready to get her nylon skin!

Once I was relatively happy with the shape of her body, with only a few minor adjustments to make, I moved onto the face.

Lying her against my scale drawings was helpful to check the shapes and proportions.
Onto the head: before I could build up the face in soft sculpture, I need to put her eyes in. They're 10mm white balls which were drilled through the centre with the smallest drill bit I have (less than 1mm thick). I then used a dremel to make oval concaves for the iris', and painted into these. The final process was to fill the concaves with a blob of clear epoxy resin glue, which is what gives them that bulging 3D look.

Onto the head: before I could build up the face in soft sculpture, I need to put her eyes in. They're 10mm white balls which were drilled through the centre with the smallest drill bit I have (less than 1mm thick). I then used a dremel to make oval concaves for the iris', and painted into these. The final process was to fill the concaves with a blob of clear epoxy resin glue, which is what gives them that bulging 3D look.

Once the glue had set, I drilled new holes into the pupils - these will be used to move the eyes in the sockets during animation.

I had previously covered the skull in a layer of thin wadding, glued down with UHU glue, to give it a sewable base.


I had previously covered the skull in a layer of thin wadding, glued down with UHU glue, to give it a sewable base.

The next stage was to insert the wire elements that would make up the features for soft sculpture. I used copper wire for the non-poseable elements, the ears and the nose. The aluminium wire for the eyelids, eyebrows and lips is very flexible so they can be animated.
I had to carefully drill tiny holes to insert the shaped pieces of wire, and glued them in with a 2 part epoxy.

I had to carefully drill tiny holes to insert the shaped pieces of wire, and glued them in with a 2 part epoxy.

The next stage was to apply a base layer of nylon to the wire elements. This is particularly important for the eyelids, as it creates the skin for them. This is stitched down to the batting in preparation for soft sculpture.

Once the base layer of nylon was down, I started building up the batting on the face. At this point it looked pretty weird!

As with the body, it was a case of pin and stitch until the shape looks right. I don't know if I ever went into much depth about the design of the skull, but it was cut back from my original sculpture of Nausicaa's 'finished face' by 3mm - the result being a simplified but accurate skull that I could soft sculpt on top of.

Given the scale it was very fiddly work - I used a fine curved needle to stitch on the tiny pieces

At this point she was finally starting to look like Nausicaa! The long pointy chin, large forehead and tiny nose are what make her face.

Comparing her face to my original sculpture was incredibly helpful - this is what she should look like when the nylon covering smooths out the seam lines.
So the next step on Nausicaa will be her skin covering, but right now I'm working on giving Kai some feathers and writing my dissertation. Next week I'll be back with a new post, discussing the creation of Kai's beak, which involved quite a lot of different processes.
Thanks again for following this project, it means a lot to me to know that you're interested in these puppets and the processes involved in making them!